Usage Instructions
1. Obtaining The Objects
Obtain all the required equipment listed
here. This includes the bin for the workspace, spray paint for the bin to reduce reflections,
the camera and robot used for collecting the FMB dataset, and the 3D-printing filament of various colors used
to print the task objects, environment fixtures, and camera mounts.
Now, 3D-print 2 side camera mount and 1 wrist camera mount, which can be found here. Make sure the wrist camera is printed with black filament, as it would be seen in some observations, while the side camera mount can be printed in any color.
Then, 3D-print the desired task objects, depending on the task being studied. For example, one can start with only a single insertion board and a handful of assembly objects to experiment with the Single-Object Assembly Task; or print one Multi-Object Assembly to study long horizon tasks. The color of filament to print each object with is specified here.
**Note** If a Franka robot is unavailable, you may still use FMB task and evaluation protocol with a different robot arm. Although the data likely will not generalize out of the box, it may be used for co-training.
2. Setting Up the Workspace
Once all the necessary materials have been obtained, you can set up the workspace for the robot according to
the instructions and dimensions in the diagram below.
2.1 Setting up the bin and wrist camera:
2.1 Setting up the bin and wrist camera:
- Spray paint the interior of the bin until it is uniform in color.
- Fix the bin 17 cm in front of the robot base.
- Fix the reorientation fixture onto the bin according to the dimensions in the diagram.
- Mount the wrist camera between the flange and gripper of the Franka arm. Make sure to re-calibrate the end-effector load in the Franka Desk interface to account for the added weight of the camera.
- Mount two vertical posts at least 25cm tall (measured from the bottom of the bin) on two sides of the bin according to the dimensions in the topdown diagram.
- Fix the two 3D-printed side camera mount onto the interior side of the post. The flat bottom edge of the camera mount should be 15cm above the bottom of the bin.
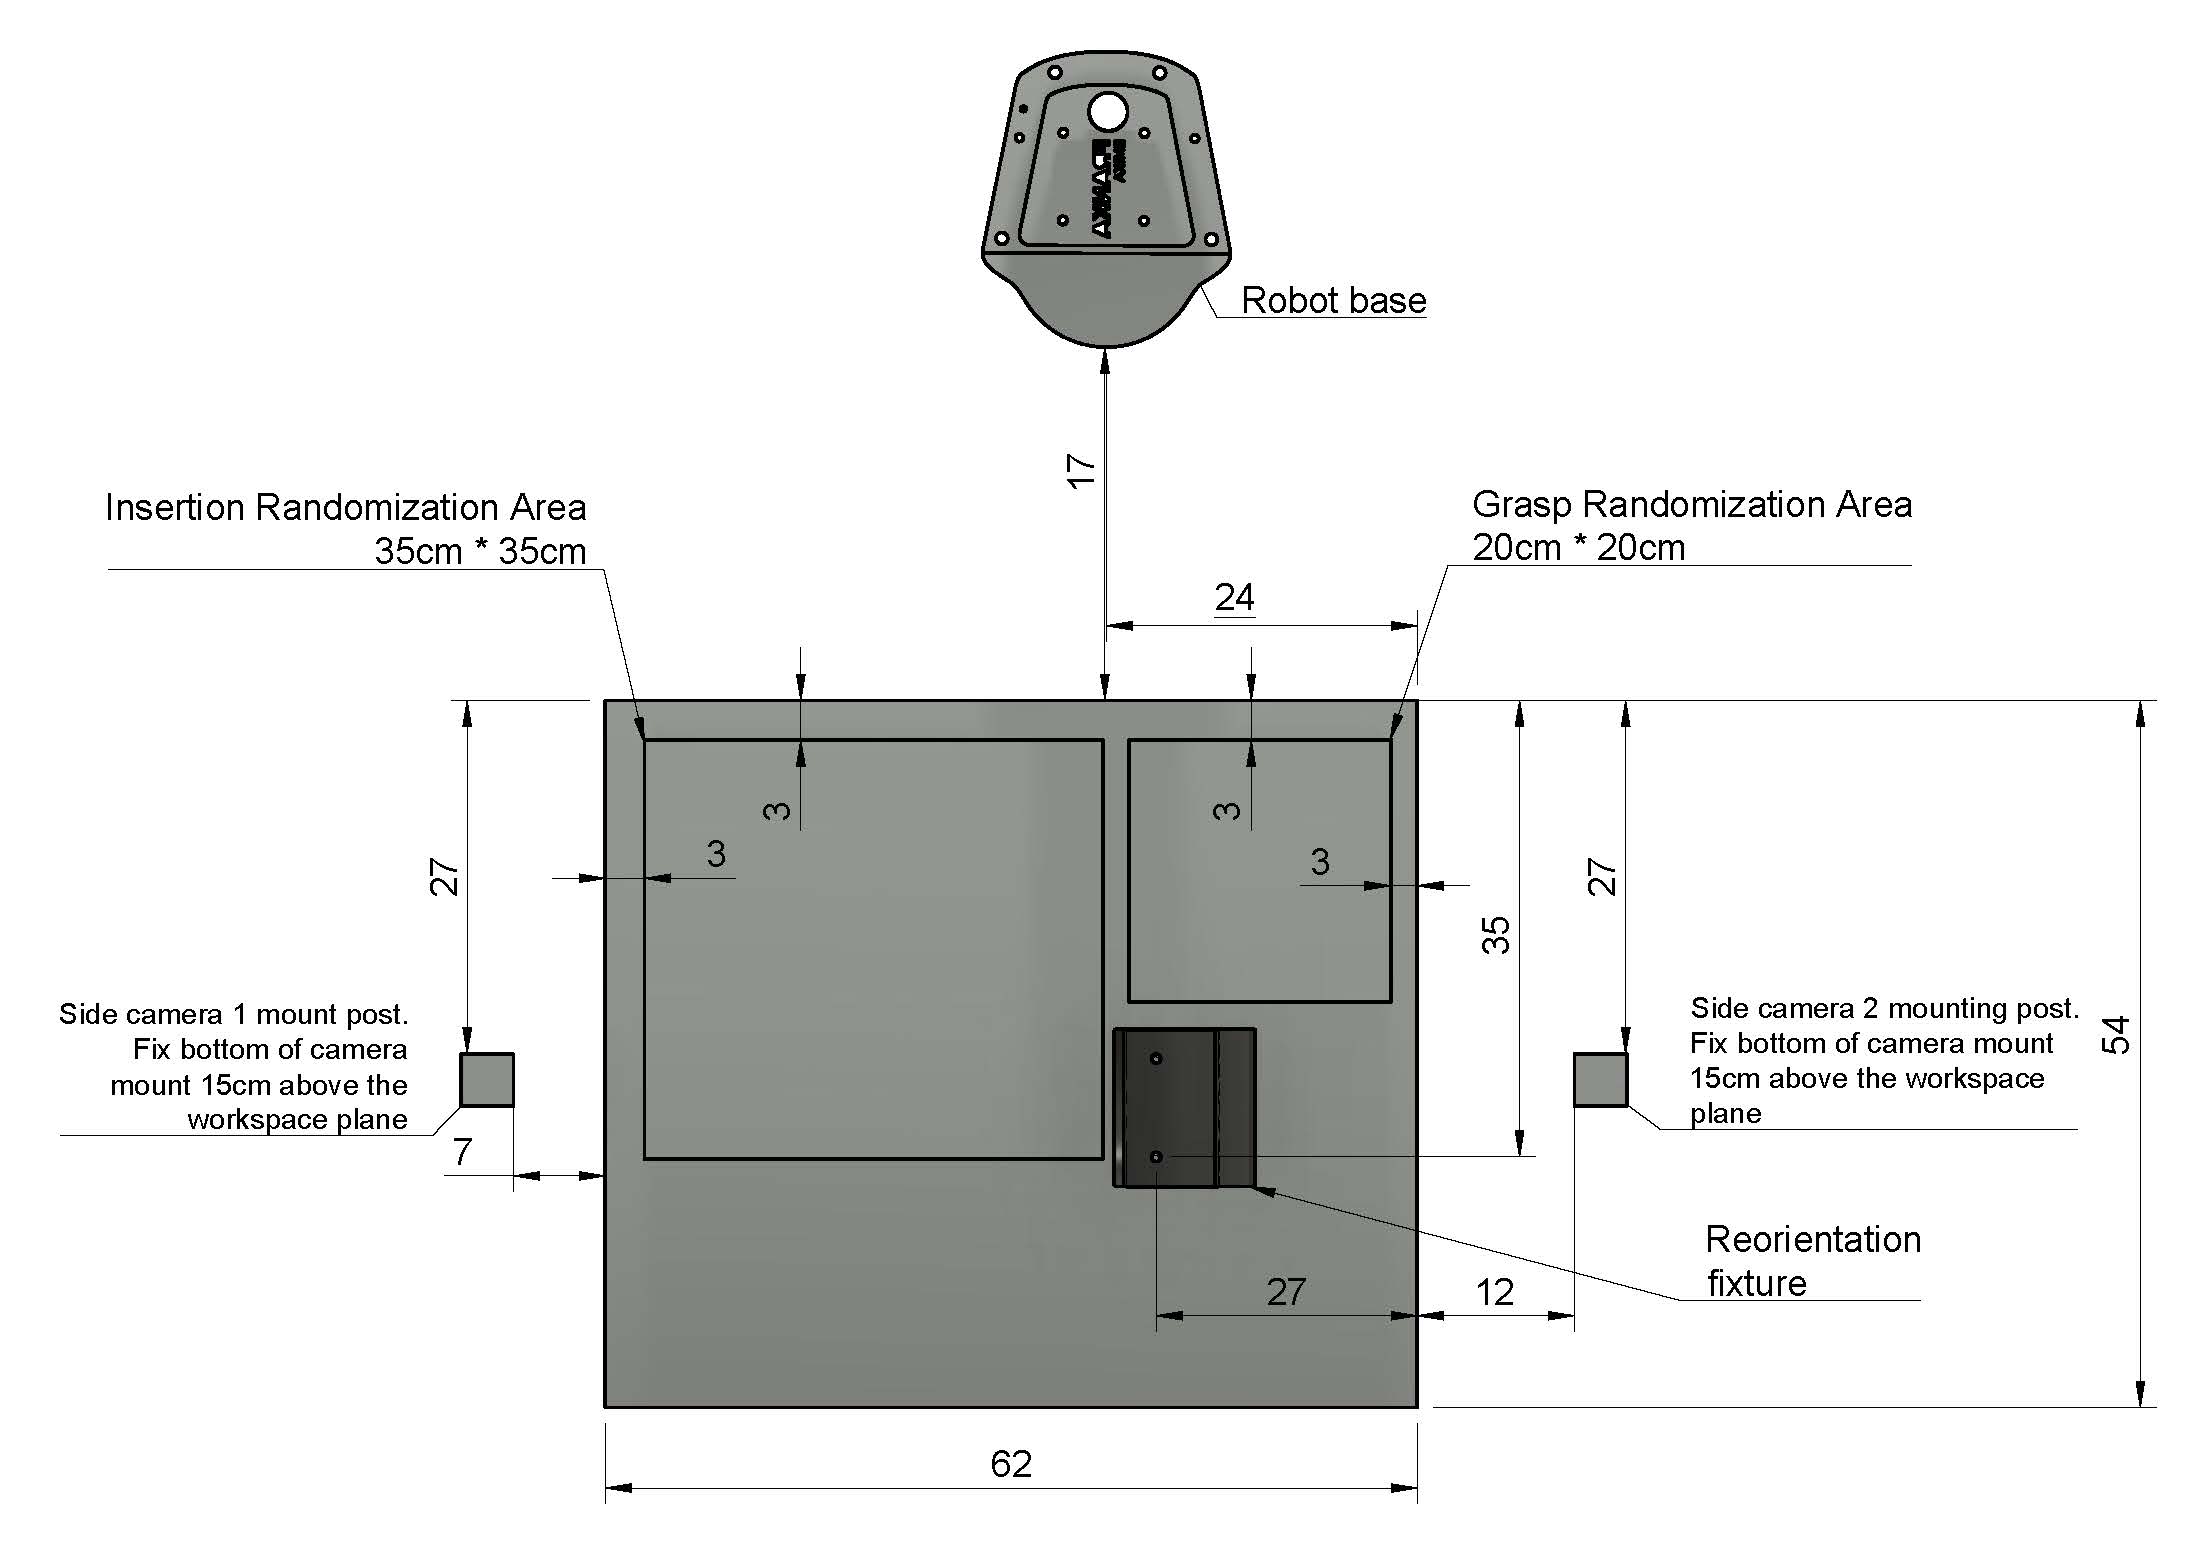
Workspace top view schematic with dimensions
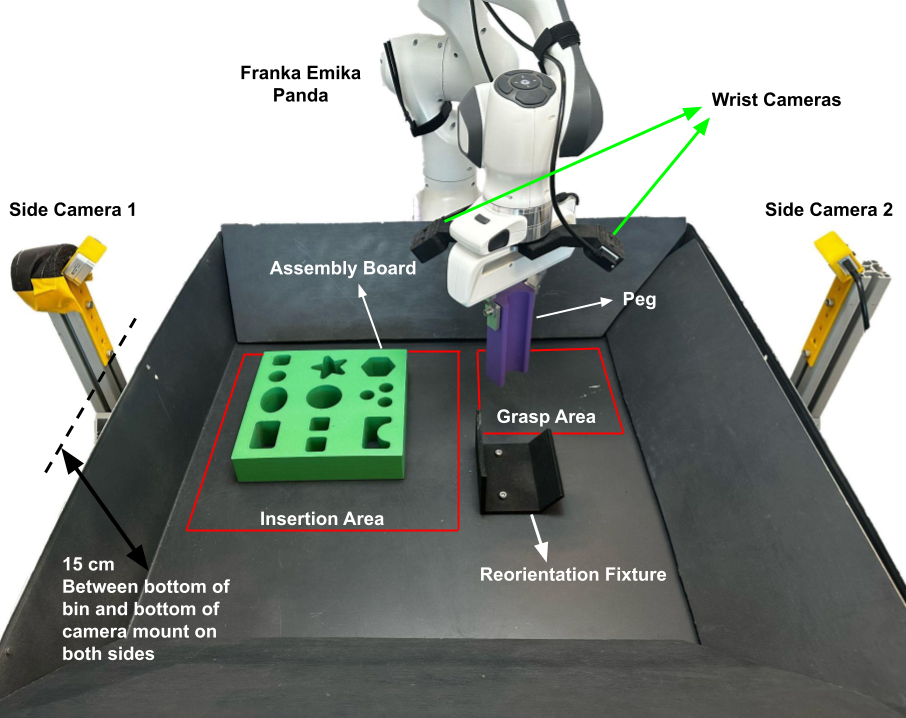
Workspace front view
3. Using the Data
The FMB dataset can be found here. It is released in
.npy format for easy of use and maximum flexibility.
The Single-Object Multi-Stage Manipulation Task dataset is bundled into one zip file containing folders of
trajectories.
Each assembly of the Multi-Object Multi-Stage Manipulation Task is grouped into separate zip files also
containing folders of trajectories.
4. Running the Robot
The full robot infra stack used to collect demos and evaluate checkpoints is available here. It includes a compliant
carteasian
position impedance control for controlling the robot, and a joint position controller to performance joint
resets.
5. Training the Baselines
The training and inference code for the ResNet- and Transformer-based models used in the FMB paper is
available on our GitHub repo.
In addition, the trained checkpoints for the experiments in the paper are also released and ready to be used here. These checkpoints can be used to verify the physical setup and test the robot infra. It can also be used as complete modules for completing parts of the task, so researchers can focus on studying the aspect of FMB they are most interested in.
In addition, the trained checkpoints for the experiments in the paper are also released and ready to be used here. These checkpoints can be used to verify the physical setup and test the robot infra. It can also be used as complete modules for completing parts of the task, so researchers can focus on studying the aspect of FMB they are most interested in.
6. Evaluating Policies
In order to compare the efficacy of different methods, we provide a detailed set of evaluation protocols for
each single primitive and
multi-step tasks. These can be found here.